How to Add A Comment Count Bubble To Blogger Post Titles
A comment bubble (or speech balloon) with the current number of comments displayed on each blogger post titles might be an excellent addition if you want to make your blog more attractive and engaging. Having a comment bubble icon could help you not only to get more comments on your blog but may, as well, give your visitors a hint about which are the most popular posts on your blog. When a post has received many comments, it could reflect the popularity of your posts and thus, make your readers and visitors to be more interested in reading them.
If you want to add a comment or speech bubble to your Blogger blog, then follow the next steps below:
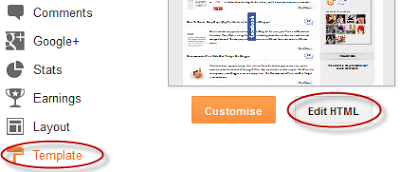
Step 1. Log in to your Blogger Dashboard > go to Template > click the Edit HTML button
Step 2. Click anywhere inside the code area and press the CTRL + F keys to open the Blogger search box
Step 3. Find the following tag in your template:
Step 4. Just above ]]></b:skin> add the following CSS styling:
Comment Bubbles
You can choose one of the images below - right click on the image you like and select "Copy Image Address/Location", then replace the blue code from step 4 with the address you just copied.


That's it! Enjoy!!! (:
Do you need to add more berita on your blog posts? Then I recommend you reading this tutorial:
If you want to add a comment or speech bubble to your Blogger blog, then follow the next steps below:
Step 1. Log in to your Blogger Dashboard > go to Template > click the Edit HTML button
Step 2. Click anywhere inside the code area and press the CTRL + F keys to open the Blogger search box
Step 3. Find the following tag in your template:
]]></b:skin>Note: before anything, you need to click on the small arrow next to it and after the code has expanded, search for the ]]></b:skin> tag again
Step 4. Just above ]]></b:skin> add the following CSS styling:
.comment-bubble {Step 5. Now find this code:
float : right;
width : 48px;
height : 48px;
background : url(https://blogger.googleusercontent.com/img/b/R29vZ2xl/AVvXsEir2GIY5evZn0Z6XWoA_bE3rRdF9-rnktEQ82TJZjGR2ZW_BNSA9cBXM1O2_SDJPG3HubetDw0HWzvmyfaUAKh0_8TY_PNy-IXpmTVB0uMSjRisID4VnSPCDCU4cPoAalw2M6CvEGGKwugR/s1600/speech+bubble+green.png);
background-repeat: no-repeat;
font-size : 18px;
margin-top : -15px;
margin-right : 2px;
text-align : center;
}
<b:if cond='data:post.title'>Note: If you can't find it, search this code instead:
<h3 class='post-title entry-title'>
<b:if cond='data:post.title'>Step 6. And add this code immediately after it:
<h3 class='post-title entry-title' itemprop='name'>
<b:if cond='data:post.allowComments'>Note:
<a class='comment-bubble' expr:href='data:post.addCommentUrl' expr:onclick='data:post.addCommentOnclick' style='color: #ffffff; font-size: 18px; font-weight: bold;'><data:post.numComments/></a>
</b:if>
- to change the color of the comments number, replace #ffffff with the hex value of your color;
- to change the font size, increase/decrease the 18px value;
Comment Bubbles
You can choose one of the images below - right click on the image you like and select "Copy Image Address/Location", then replace the blue code from step 4 with the address you just copied.


That's it! Enjoy!!! (:
Do you need to add more berita on your blog posts? Then I recommend you reading this tutorial:


I have bookmarked your website because this site contains valuable information in it. I am really happy with articles quality and presentation. Thanks a lot for keeping great stuff. I am very much thankful for this site. SEO Expert here
ReplyDelete